In addition to setting an account-level email domain, you can also configure individual domains for each store. This gives you greater flexibility and control over how emails are sent to your customers.
You can find these settings by navigating to Emails in the sidebar of your store dashboard.
Adding a Store Email Domain
-
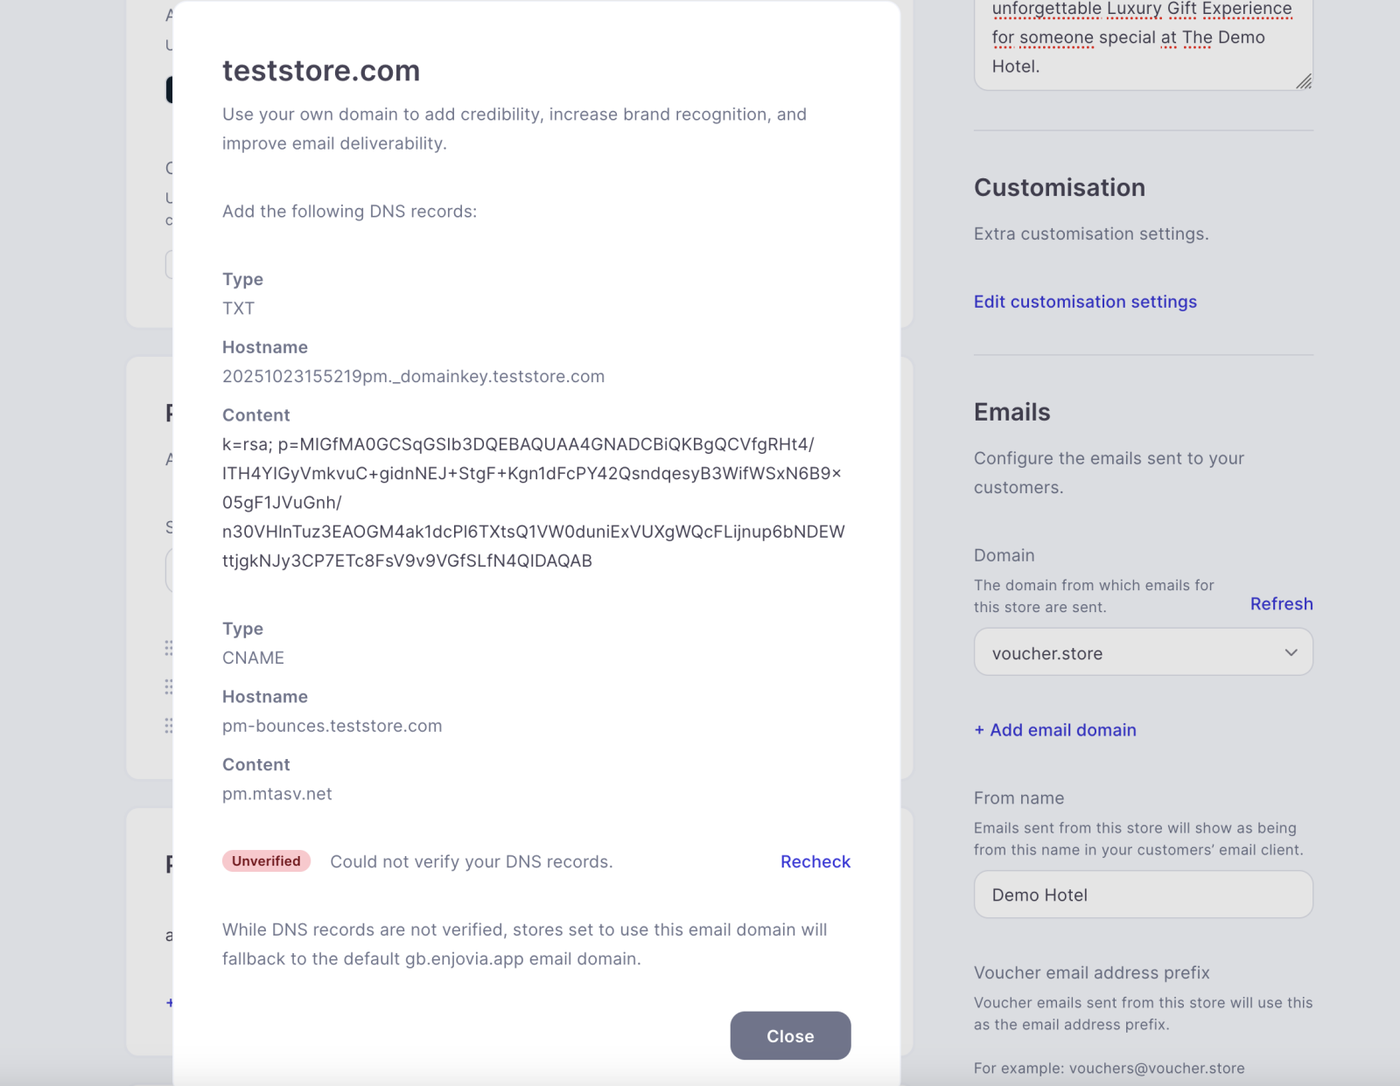
Click + Add Email Domain.
-
If you’ve already added a domain at the account level, it will appear in the dropdown list.
-
-
When you select a domain, a pop-up window will appear with setup instructions.
These instructions will guide you through adding two new DNS records to your domain host (for example, GoDaddy, WPX, or similar).
Once you’ve added the DNS records, return to this page and click Recheck to verify your setup.
-
If the records have been added correctly, the domain will show as Verified.
-
If not, it will remain Unverified until the changes have propagated.
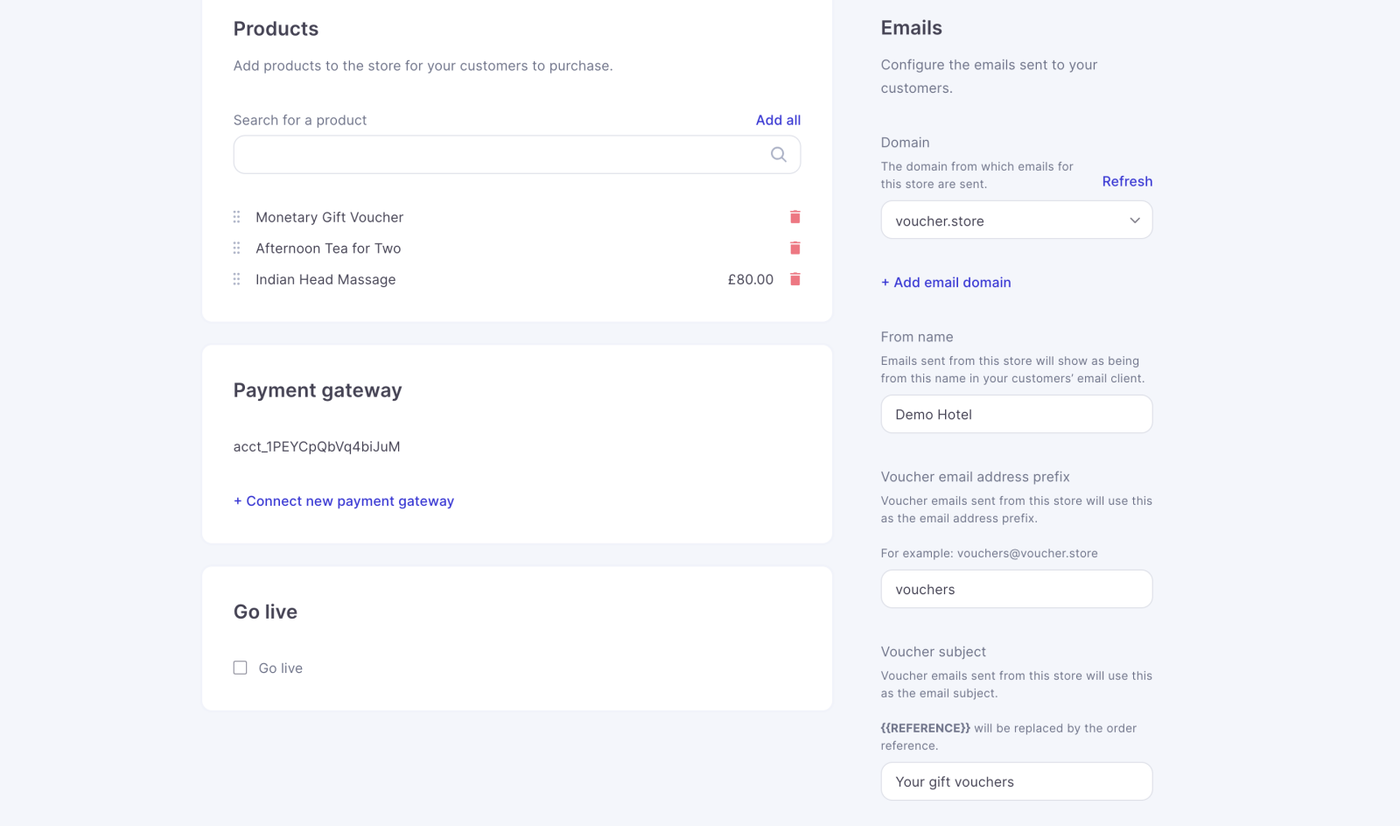
Customising Email Settings
Once your domain is verified, you can personalise how your outgoing emails appear to customers.
Voucher Email Settings
-
From Name: The sender name that appears in your customer’s inbox. This should typically match the business or store name.
-
Voucher Email Prefix: The prefix used for your voucher emails.
-
For example, setting the prefix to vouchers will send emails from
vouchers@yourdomain.com.
-
-
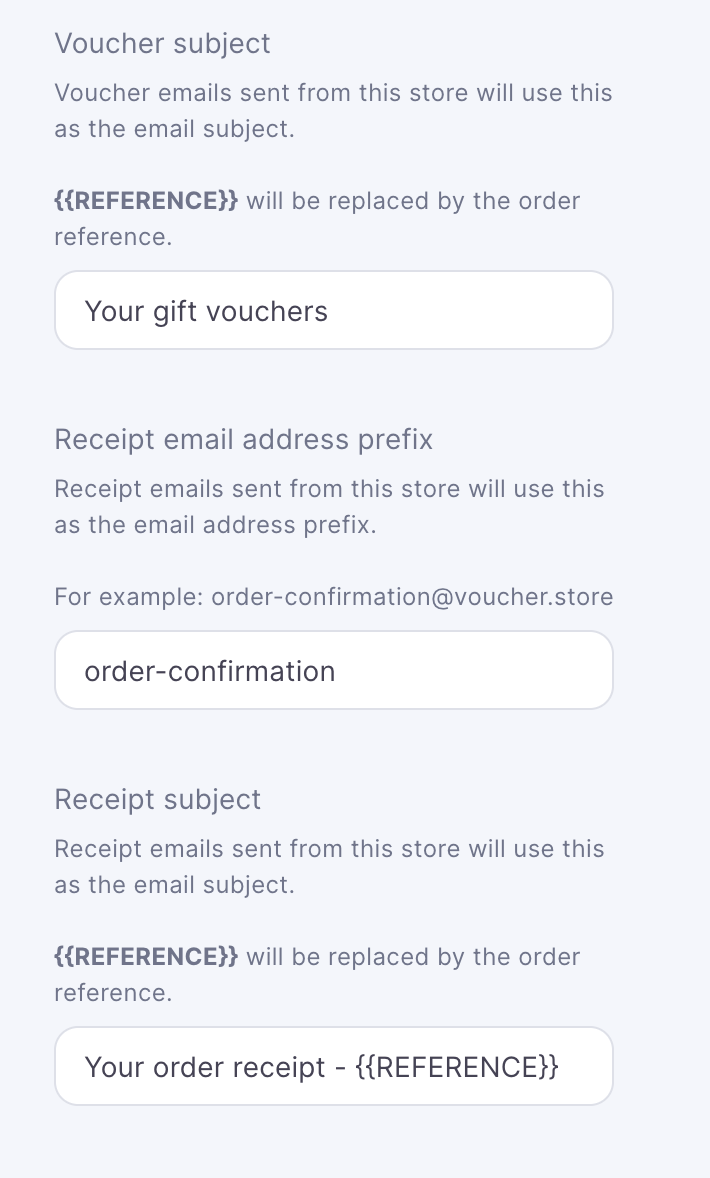
Voucher Subject: The subject line for voucher emails.
-
You can include the customer’s order reference by adding
{{REFERENCE}}in the subject line.
-
Receipt Email Settings
You can also set up similar options for receipt emails:
-
Receipt Email Prefix: The prefix used for receipt emails.
-
Receipt Subject: The subject line customers will see when they receive their order receipt.
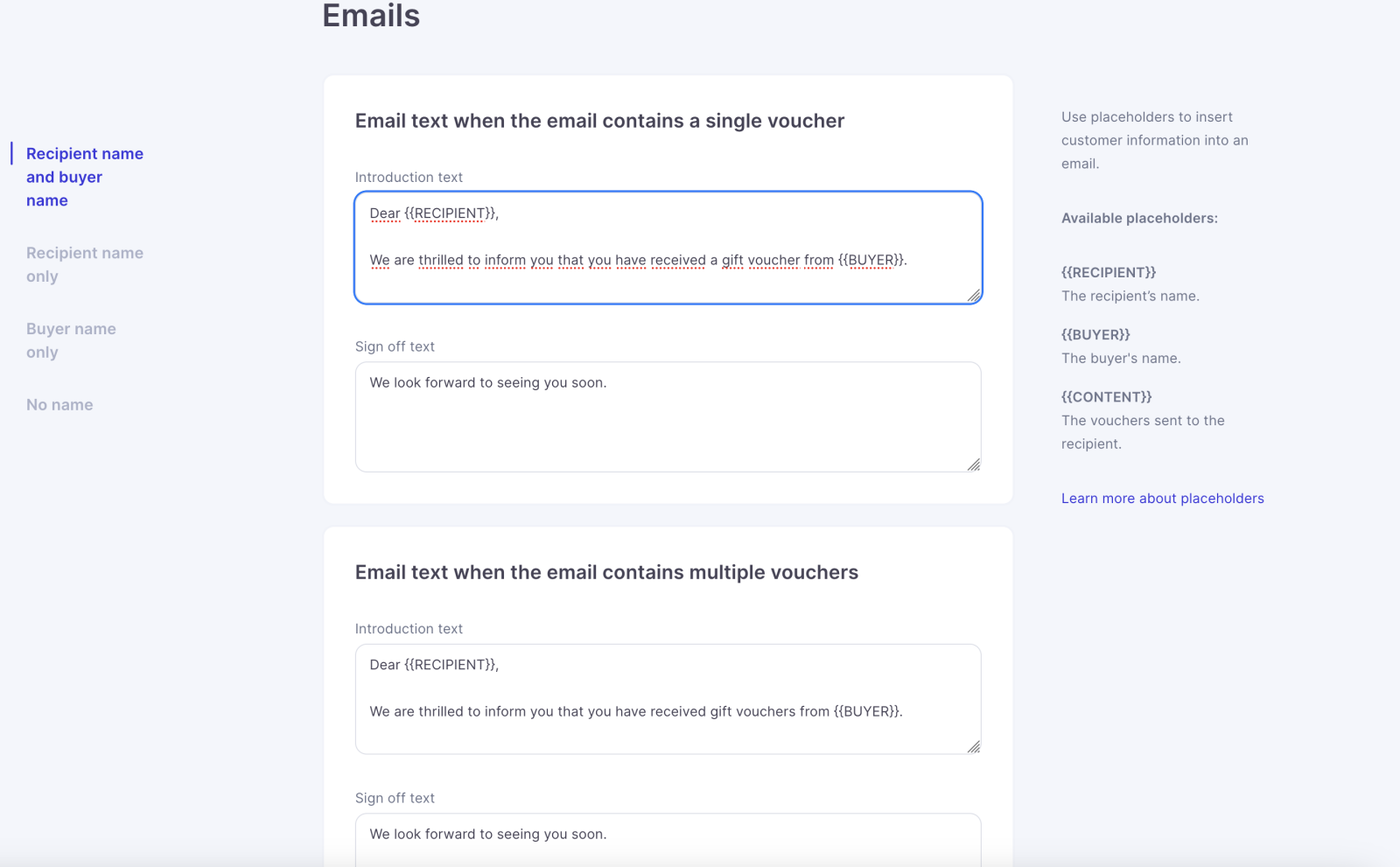
Editing Email Content
You can fully customise the content of the emails sent to your customers.
There are four pre-set email templates to choose from:
-
Recipient name and buyer name
-
Recipient name only
-
Buyer name only
-
No name
Saving Your Changes
After editing your email settings and templates, be sure to save your changes on the main store page.
Scroll to the bottom of the page and click Save to confirm.