The enjovia system allows you to design and customise your voucher store.
There are a number of options to run through when first setting up a store, and don't worry too much, these can be edited at any time.
To find the store options - go to store on the sidebar
Note: Every white option in the middle is required, whereas every option on the right hand side is optional.
You will have two options to choose before you store is made, the first option is a single product vs multi product store.
The option screen will look like this:

A multi product store is designed for stores where your customers will have lots of choice, perhaps monetary vouchers, experience vouchers and more.
The store front would look something like this:

Whereas a single product store is designed for stores in which you will only ever be selling a single product, this is typically designed for businesses looking to sell monetary vouchers or gift cards only. This changes the visuals of the store and puts customers directly on the product page.
A single product store would look something like this:

Warning : This is not reversible once done, to add further products to a single product store you would need to make a new store
After selecting your store type, you will be able to select your language.
The system currently supports: UK and US English, French, German, Spanish, Italian, Czech, Polish.

The first thing you will be asked to do is to give your store a name, this will usually match your businesses name, but not always.
The URL will automatically generate from the name. but feel free to edit this part too.
The second set of options are localisation - enjovia operate across countries all over the world, where their are dozens of price formats, the usual, will be £ $ € (symbol) followed by price, which is the default setting.

If your business operates in a country where prices do not include sales tax, ensure the prices include sales tax box is unticked
The optional settings here are :
Search engine listing - make sure your store is SEO optimised, we will add by default your business name and a description to cover every base, but we would recommend personalising it to your business and specific search engine optimisation requirements.
Categories - Here you can add categories you have made to specific stores. Sort products into categories to help streamline the customer experience, learn more about setting up categories and what they do here.
The next optional setting is fulfilment, this is a major setting, which enables vouchers to be generated as PDFs for postal and collectional orders. Please see our fulfilment help page here.

In the next section we will cover the store appearance.

The first thing to do are set your nav bar logo, this is the business logo that will appear in the top of the nav bar of your store, we would highly recommend using PNG images - transparent backgrounds or white background jpegs (if you are going with the light navbar theme)
Our recommended size for logo images is 320 x 180 pixels, but the system can handle different sizes.
The second thing is to set the email logo, this is the email which will contain the customers gift, in almost all cases this would be the same as the store logo.
The reciept logo is the logo which sits on top of the reciept email post purchase, again this would almost always be the same as above, but the option is there to change (like the example above)
The optional setting here is a banner image.
Here are the differences between stores with a banner image:

and without:

This banner image can be just an image, or have a text overlay, the image should have minimum dimensions of : 1920 x 400 pixels.
If you wish to use the overlay as with the example above, there are a number of options:
Overlay Text - What you want the overlay to say.
Overlay Font - We have a handful of fonts preloaded into the system ready but get in touch with us if you are after a specific font.
Overlay Font Size (small screen) - This is the font size you would like on smaller screens like mobile devices.
Overlay Font Size (large screen) - This is the font size you would like on larger screens like desktops and tablets.
Overlay Font Weight - Select what boldness or weight you want your overlay to display as.
Background Opacity - can you blur the background to highlight the text.
Our recommended settings are: 150% Font size for small screen, 300% Font size for large screen, Overlay font weight: Bold and using a background opacity of 30%.
Store Category View
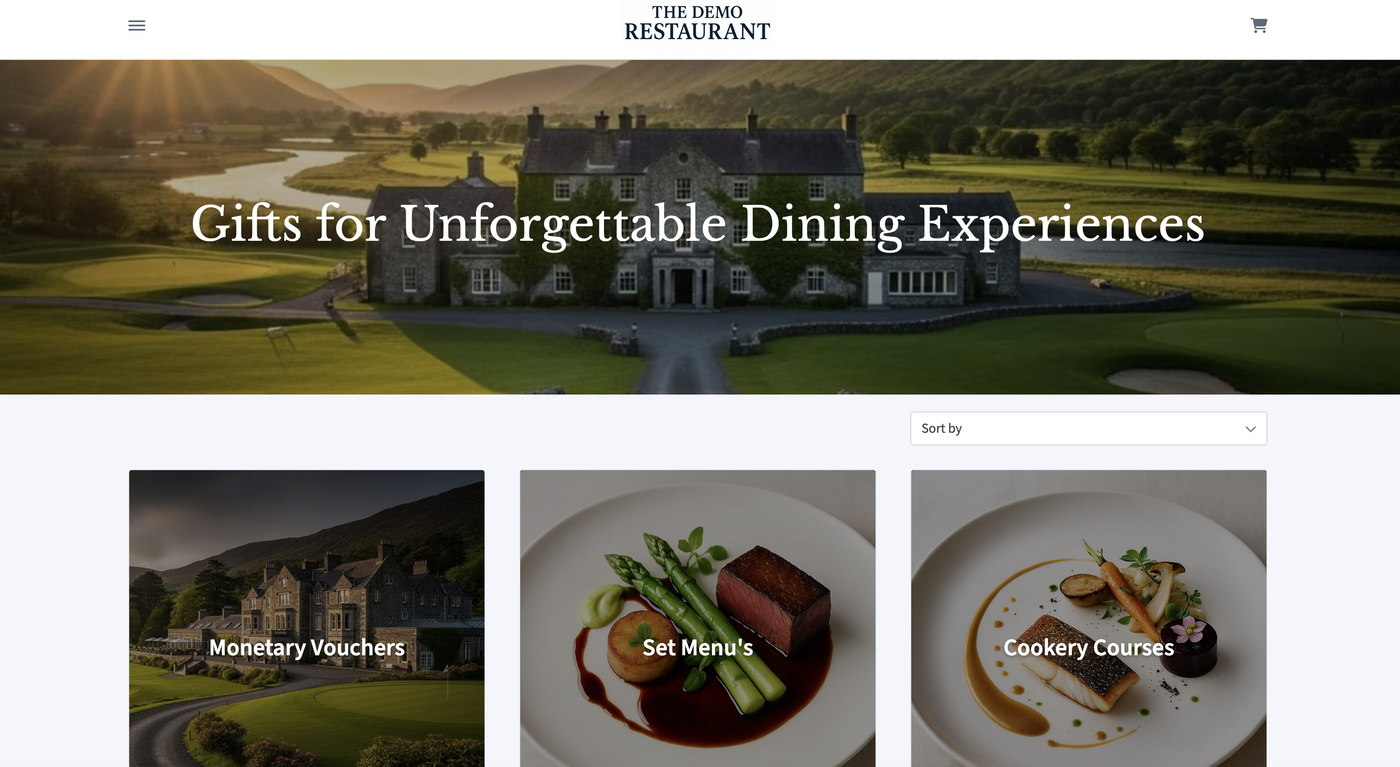
If you wish to split your products into categories our system will also support a category view if you select, show category tiles on homepage.
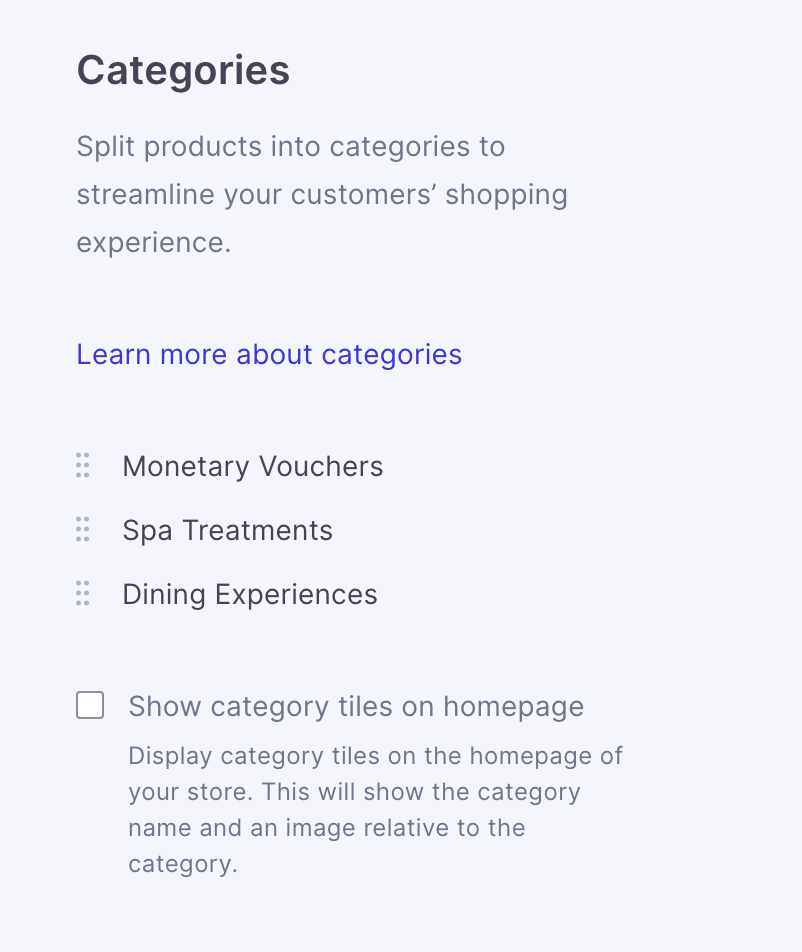
For these categories to be visually rich, make sure you make them in the category section , you can upload a tile image which will appear on the homepage when the view is selected. If you choose this option then your homepage will swith from a product view to a category view by default like the example here:
In the next section we will cover the final appearance options.

In this section you can change the nav and footer themes to dark, black or white. Our recommended settings would be light for nav bar theme and dark or black for the footer.
You can then select an accent colour, this is the colour the basket will turn into when a product has been added.
The contrast colour is the colour of the basket icon when a product has been added into the basket, our recommendation would be to use a colour that contrasts with the colour above.
Adding products to the store.
From the store page you are able to add products to that specific store, if you have a single store this will automatically happen, if you have multiple stores from a single account you will need to add each product to specific stores.
If you have a large catalogue, use the search bar to find the products that you want, or alternatively press add all, to add them all at once.
Important note: The order the products appear on your homepage can be changed by dragging and dropping them into the desired order on this store page.
Further customisation options.
There are a few more customisation options:
Show personalisation dialog - This option prompts the customer to personalise their voucher after adding a product to the basket, they can add a reciever, a sender and add a personal note which will be displayed on the voucher that gets sent out.
Show enhancements dialog - When products have enhancements, you can select whether you want to additionally prompt the customer to add one after adding a product to their basket.
Show categories filter - This displays a dropdown filter on the store homepage which allows the customer to only show products from a certain category.
Show locations filter - This displays a dropdown filter on the store homepage which allows customers to only show products from a certain location.

You can also customise the emails which get sent out to customers, for further information on how that works, click here.
The final few options are to connect your payment gateway, if you run a single store, this will happen automatically.
You can change the information pages, like terms and conditions, privacy policy and create and edit FAQs which will appear on your store footer to answer questions you may get frequently.
Don't worry! We have set up default templates for the terms and conditions and privacy policy which are ready to use.

The final section is tags to set up specific tags for API connections on a store level. When you are happy with your store and settings, press save changes.
🥳 Congratulations your store is now designed and almost ready! 🥳
Note: To preview your store, click on the store page again and open up the URL link under the name.
